ES详解 - 索引:索引管理详解
ES详解 - 索引:索引管理详解
了解基本使用后,我们从索引操作的角度看看如何对索引进行管理。
1. 索引管理的引入
我们在前文中增加文档时,如下的语句会动态创建一个customer的index:
PUT /customer/_doc/1
{
  "name": "John Doe"
}
而这个index实际上已经自动创建了它里面的字段(name)的类型。我们不妨看下它自动创建的mapping:
{
  "mappings": {
    "_doc": {
      "properties": {
        "name": {
          "type": "text",
          "fields": {
            "keyword": {
              "type": "keyword",
              "ignore_above": 256
            }
          }
        }
      }
    }
  }
}
那么如果我们需要对这个建立索引的过程做更多的控制:比如想要确保这个索引有数量适中的主分片,并且在我们索引任何数据之前,分析器和映射已经被建立好。那么就会引入两点:第一个禁止自动创建索引,第二个是手动创建索引。
- 禁止自动创建索引
可以通过在 config/elasticsearch.yml 的每个节点下添加下面的配置:
action.auto_create_index: false
手动创建索引就是接下来文章的内容。
2. 索引的格式
在请求体里面传入设置或类型映射,如下所示:
PUT /my_index
{
    "settings": { ... any settings ... },
    "mappings": {
        "properties": { ... any properties ... }
    }
}
- settings: 用来设置分片,副本等配置信息
- mappings: 字段映射,类型等
- properties: 由于type在后续版本中会被Deprecated, 所以无需被type嵌套
3. 索引管理操作
我们通过kibana的devtool来学习索引的管理操作。
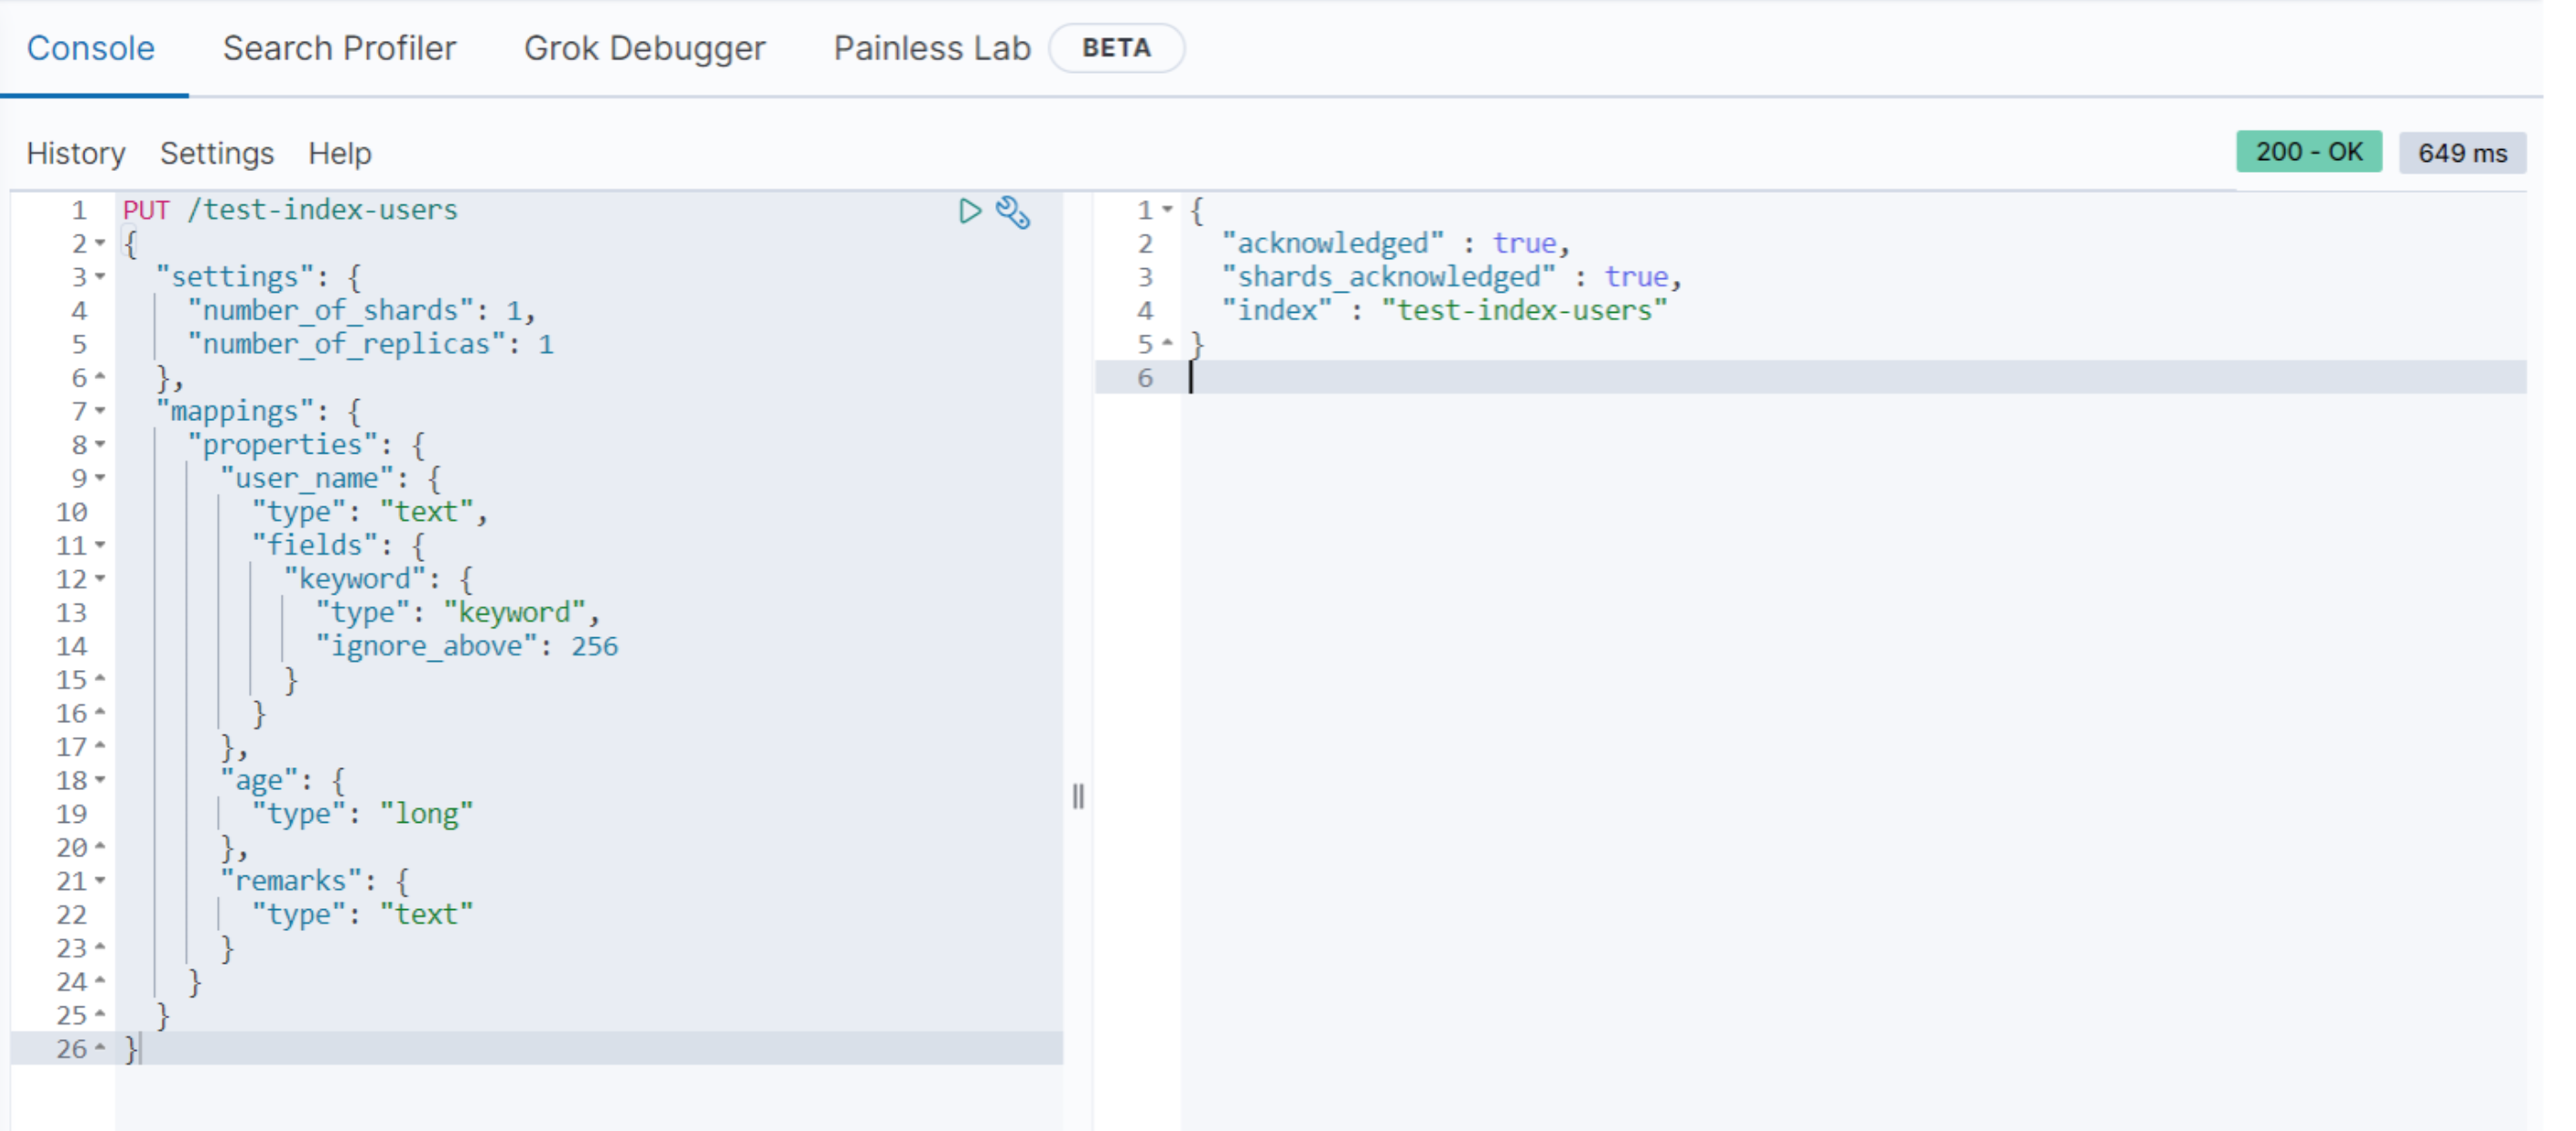
3.1 创建索引
我们创建一个user 索引test-index-users,其中包含三个属性:name,age, remarks; 存储在一个分片一个副本上。
PUT /test-index-users
{
  "settings": {
		"number_of_shards": 1,
		"number_of_replicas": 1
	},
  "mappings": {
    "properties": {
      "name": {
        "type": "text",
        "fields": {
          "keyword": {
            "type": "keyword",
            "ignore_above": 256
          }
        }
      },
      "age": {
        "type": "long"
      },
      "remarks": {
        "type": "text"
      }
    }
  }
}
执行结果
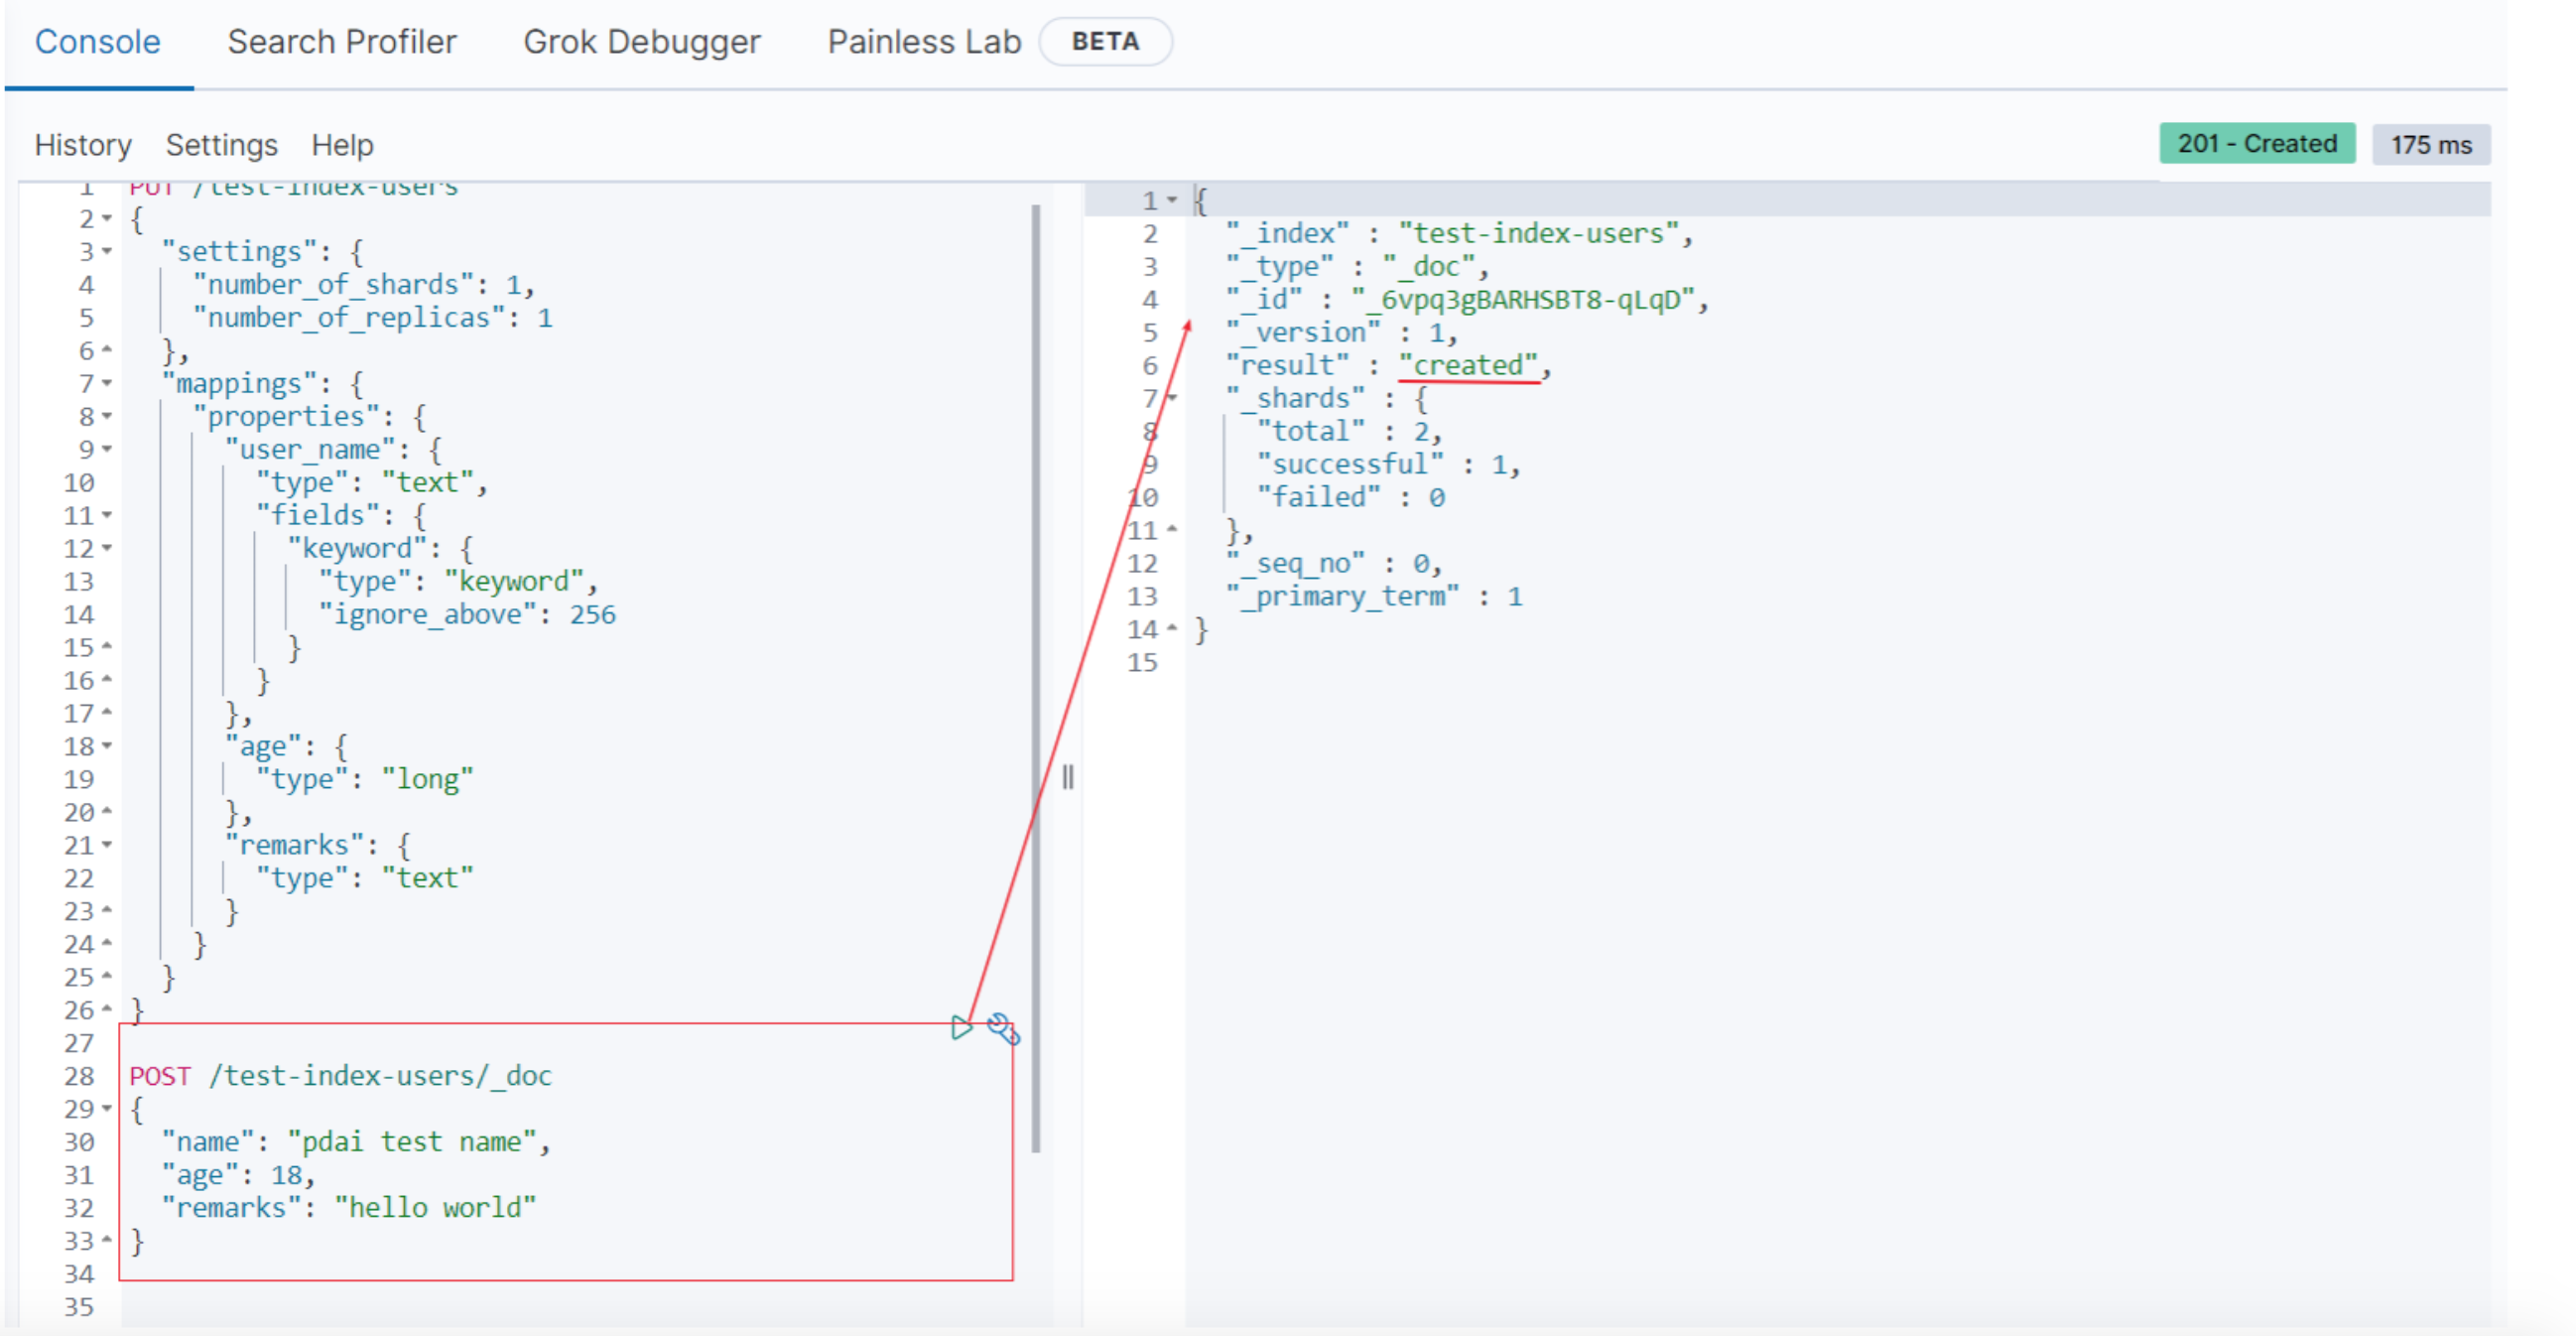
- 插入测试数据
post /test-index-users/_doc
{
  "name":"zhangsan",
  "age":18,
  "remarks":"hello world"

}
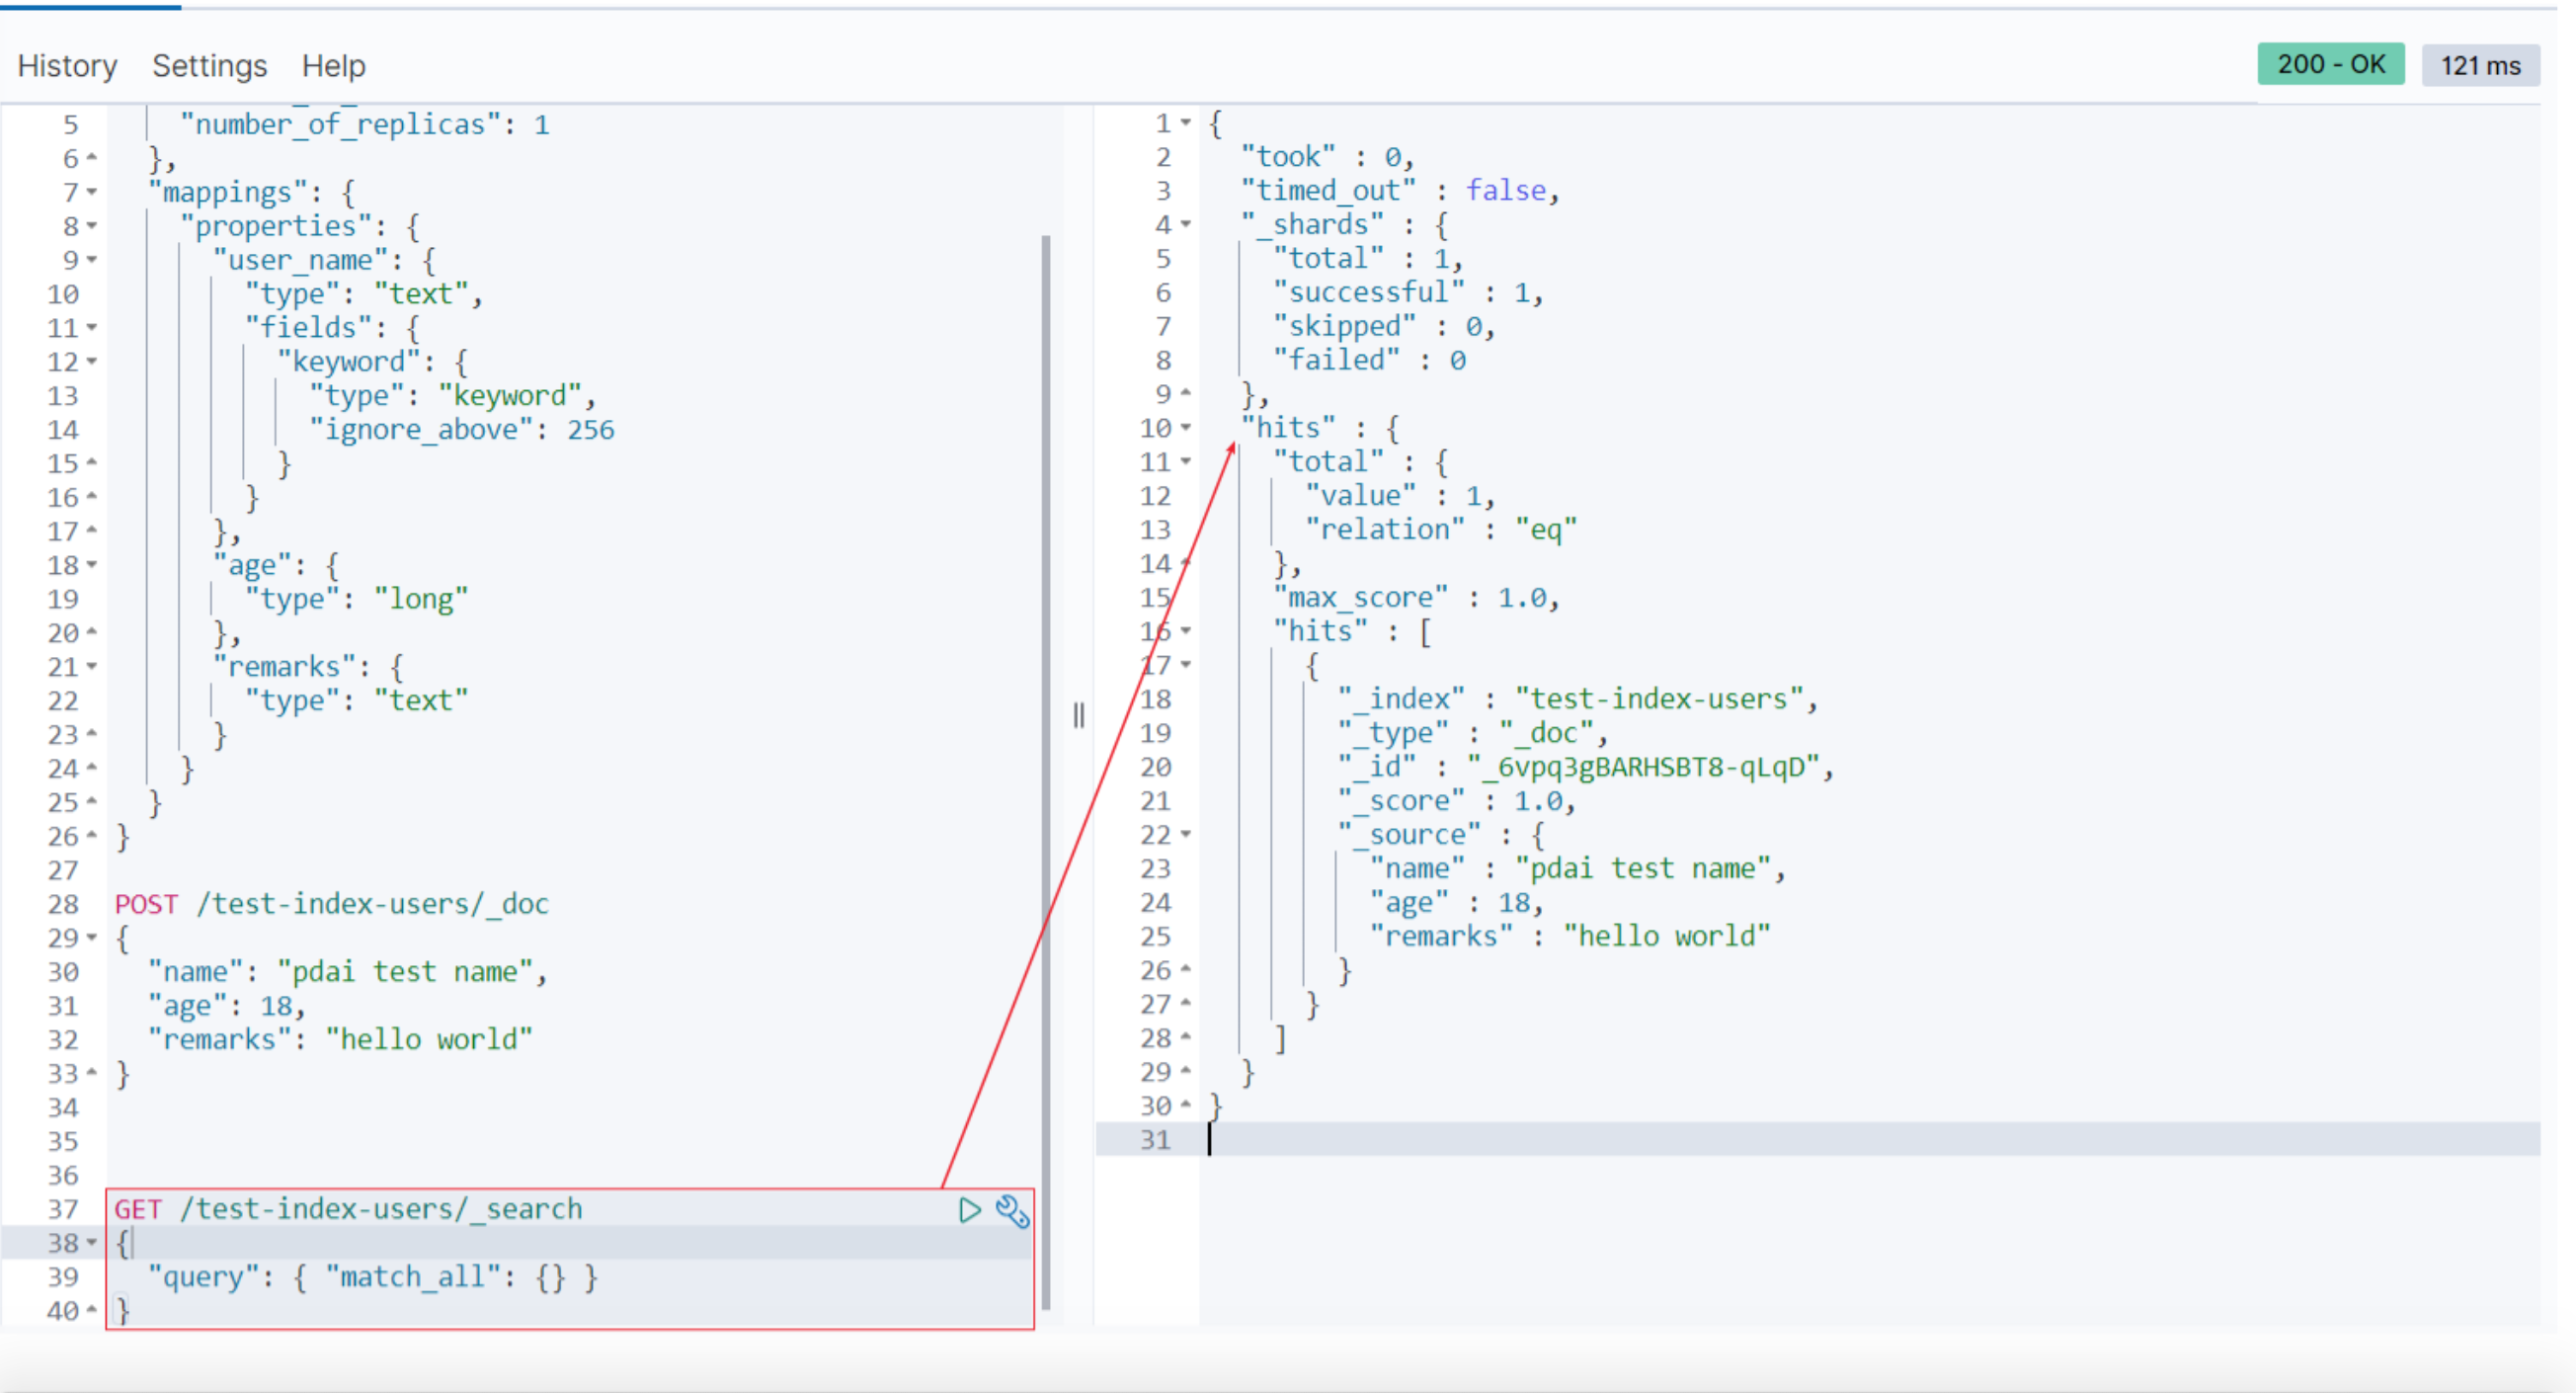
- 查看数据
GET /test-index-users/_search
{
  "query": {"match_all": {}}
}
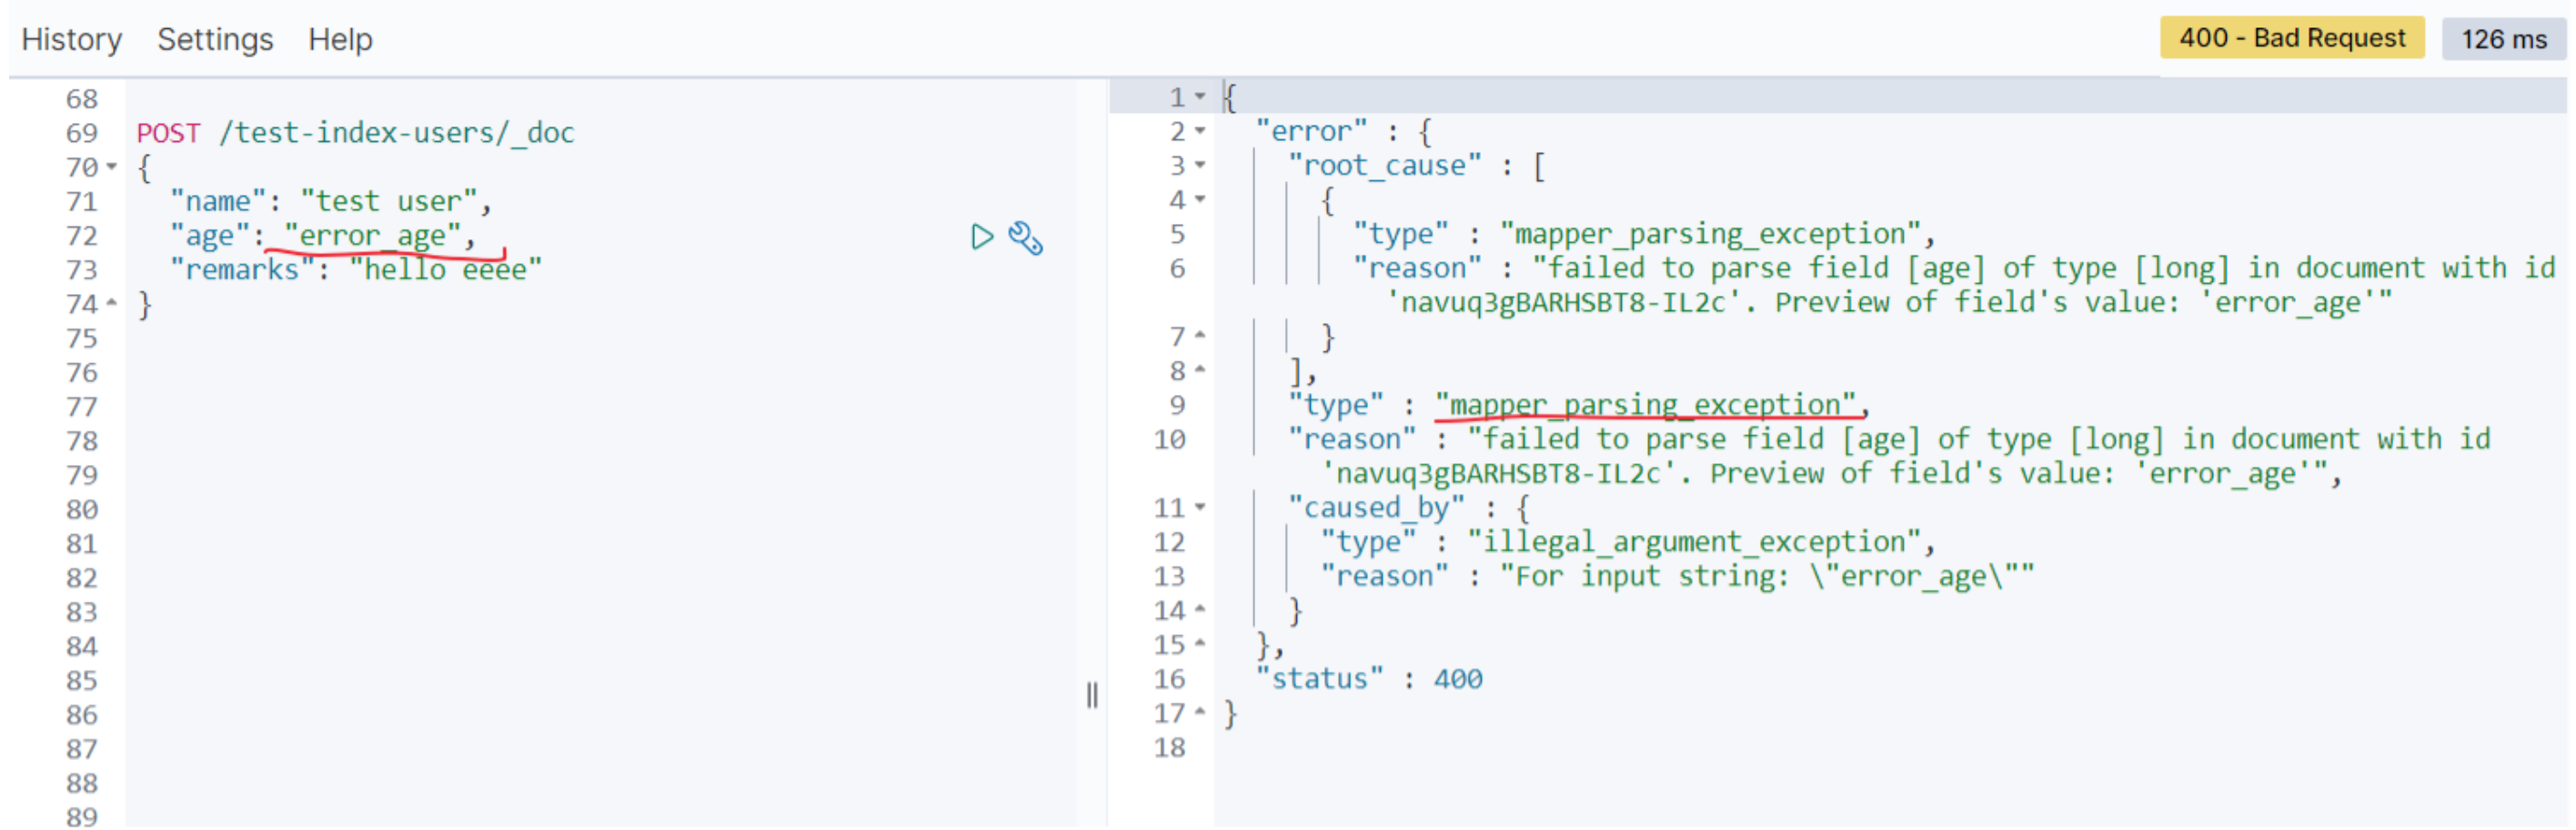
- 我们再测试下不匹配的数据类型(age):
POST /test-index-users/_doc
{
  "name": "test user",
  "age": "error_age",
  "remarks": "hello eeee"
}
你可以看到无法类型不匹配的错误:
3.2 修改索引
查看刚才的索引,curl 'localhost:9200/_cat/indices?v' | grep users
yellow open test-index-users LSaIB57XSC6uVtGQHoPYxQ 1 1 1 0 4.4kb 4.4kb
我们注意到刚创建的索引的状态是yellow的,因为我测试的环境是单点环境,无法创建副本,但是在上述number_of_replicas配置中设置了副本数是1; 所以在这个时候我们需要修改索引的配置。
修改副本数量为0
PUT /test-index-users/_settings
{
  "settings": {
    "number_of_replicas": 0
  }
}

再次查看状态:
green open test-index-users LSaIB57XSC6uVtGQHoPYxQ 1 1 1 0 4.4kb 4.4kb
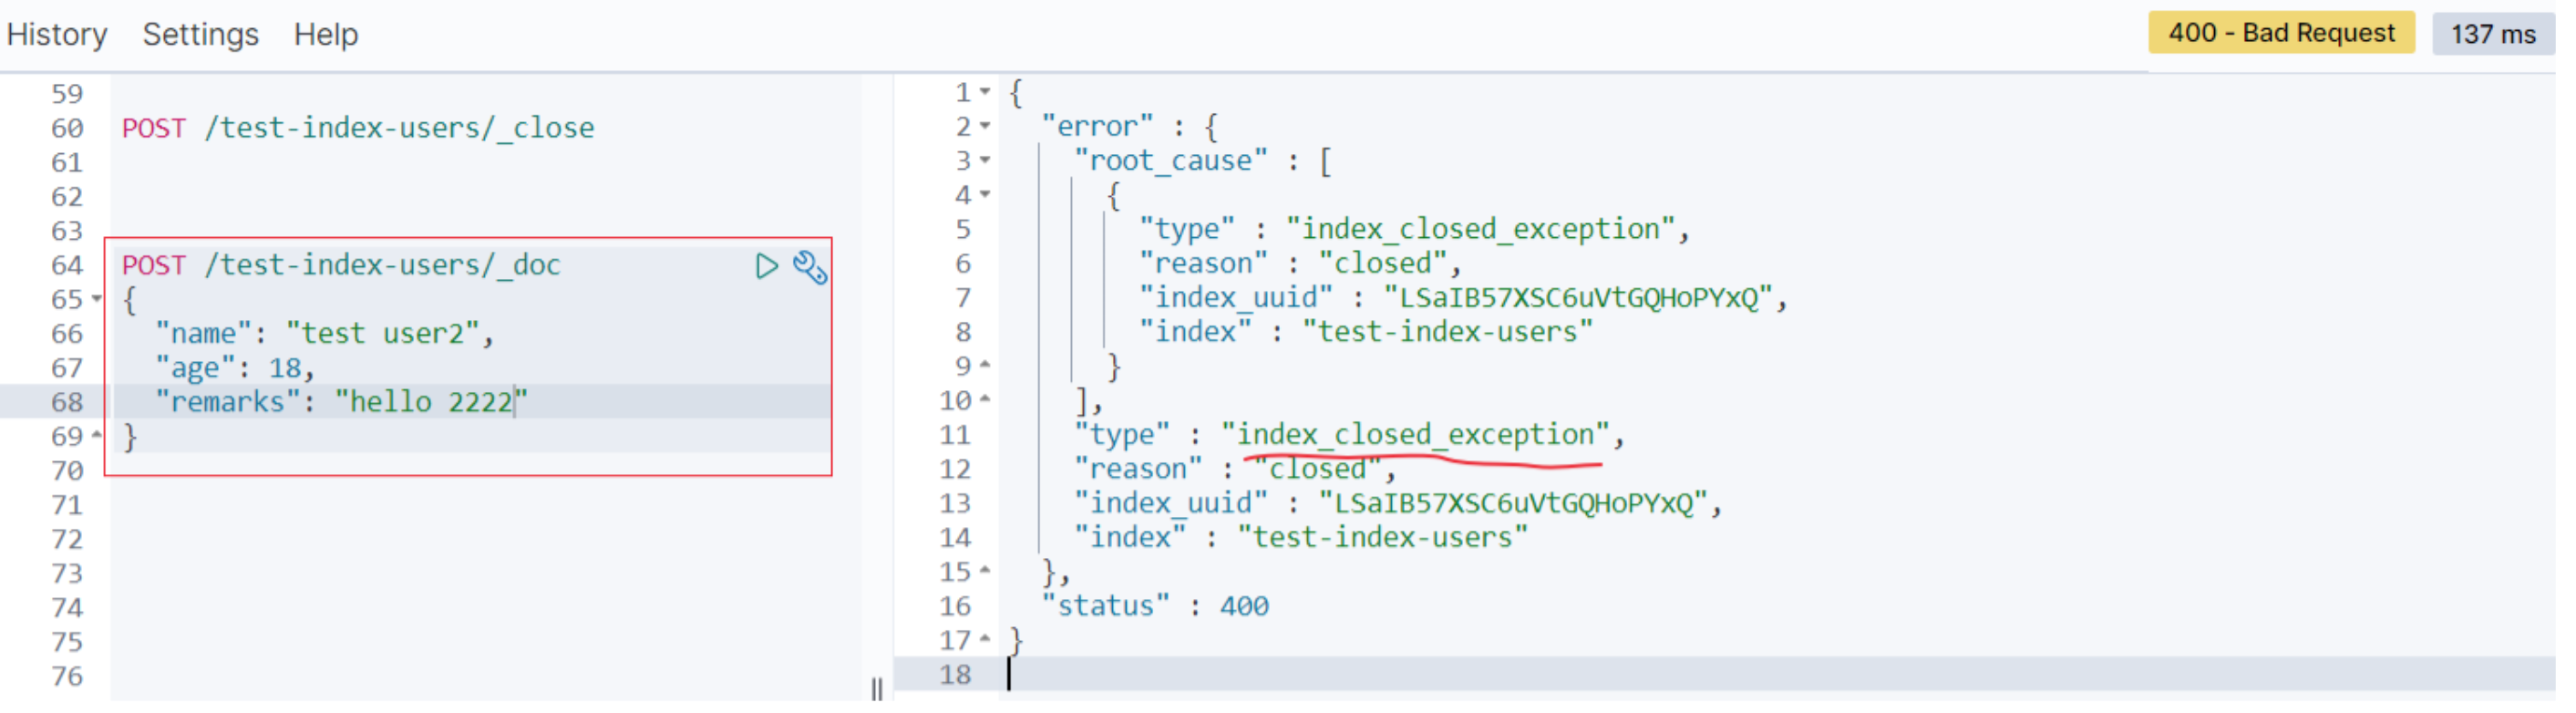
3.3 打开/关闭索引
关闭索引
POST /test-index-users/_close
一旦索引被关闭,那么这个索引只能显示元数据信息,不能够进行读写操作。

当关闭以后,再插入数据时:
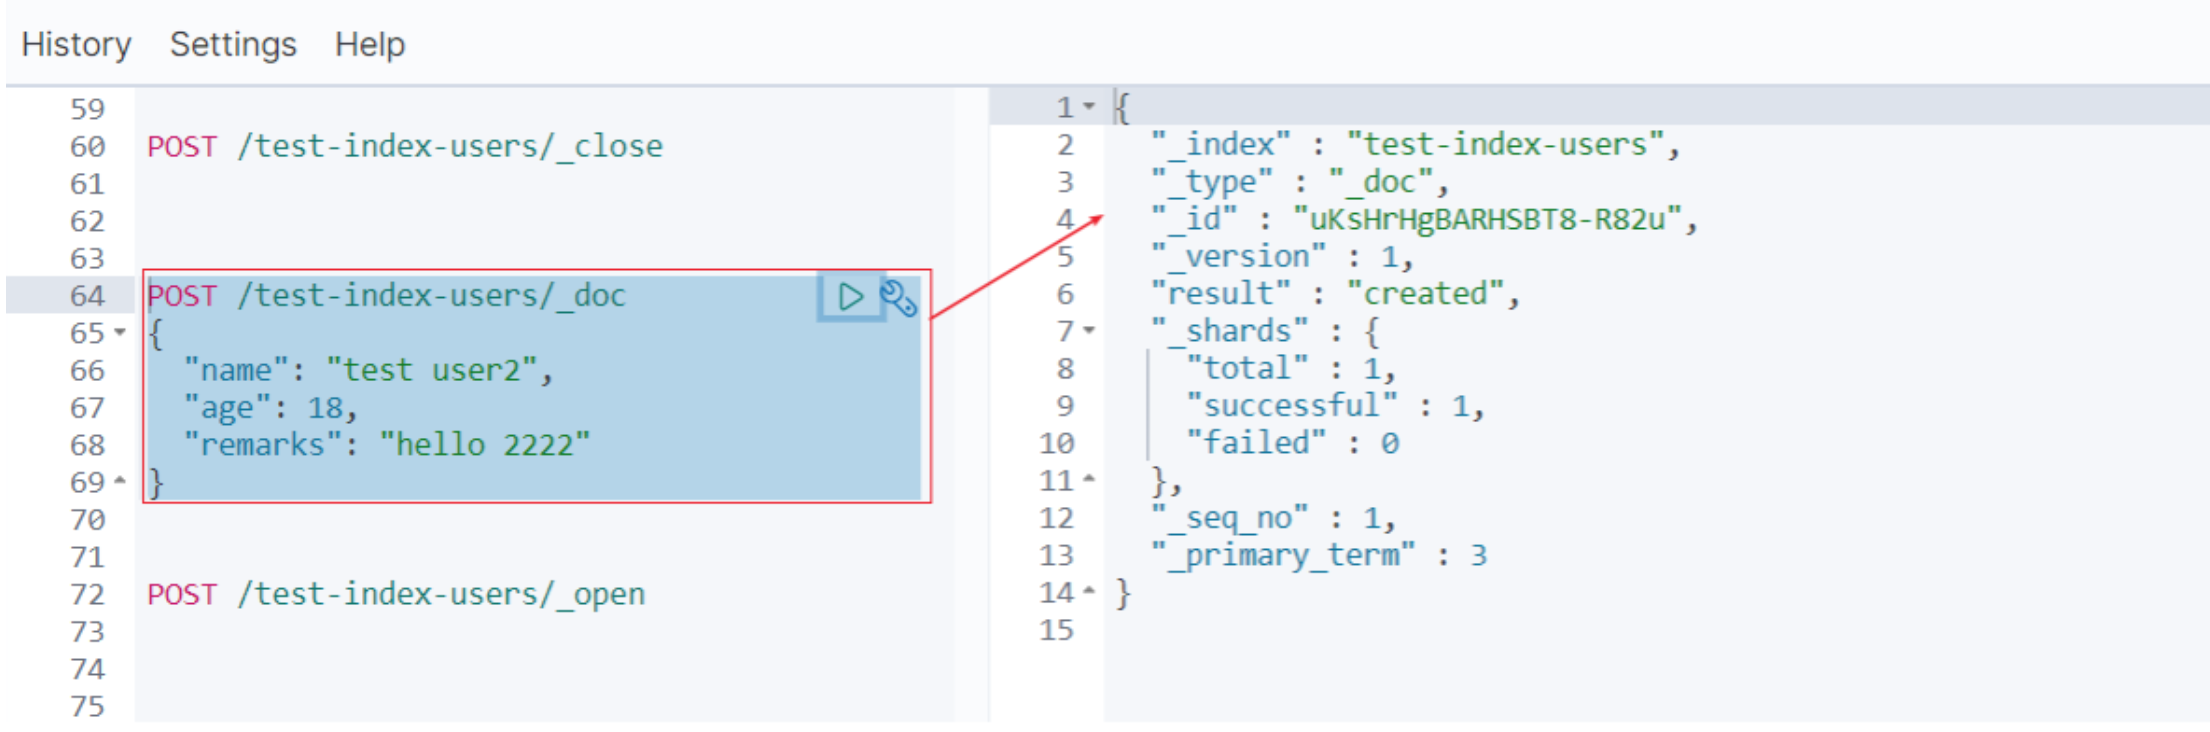
- 打开索引
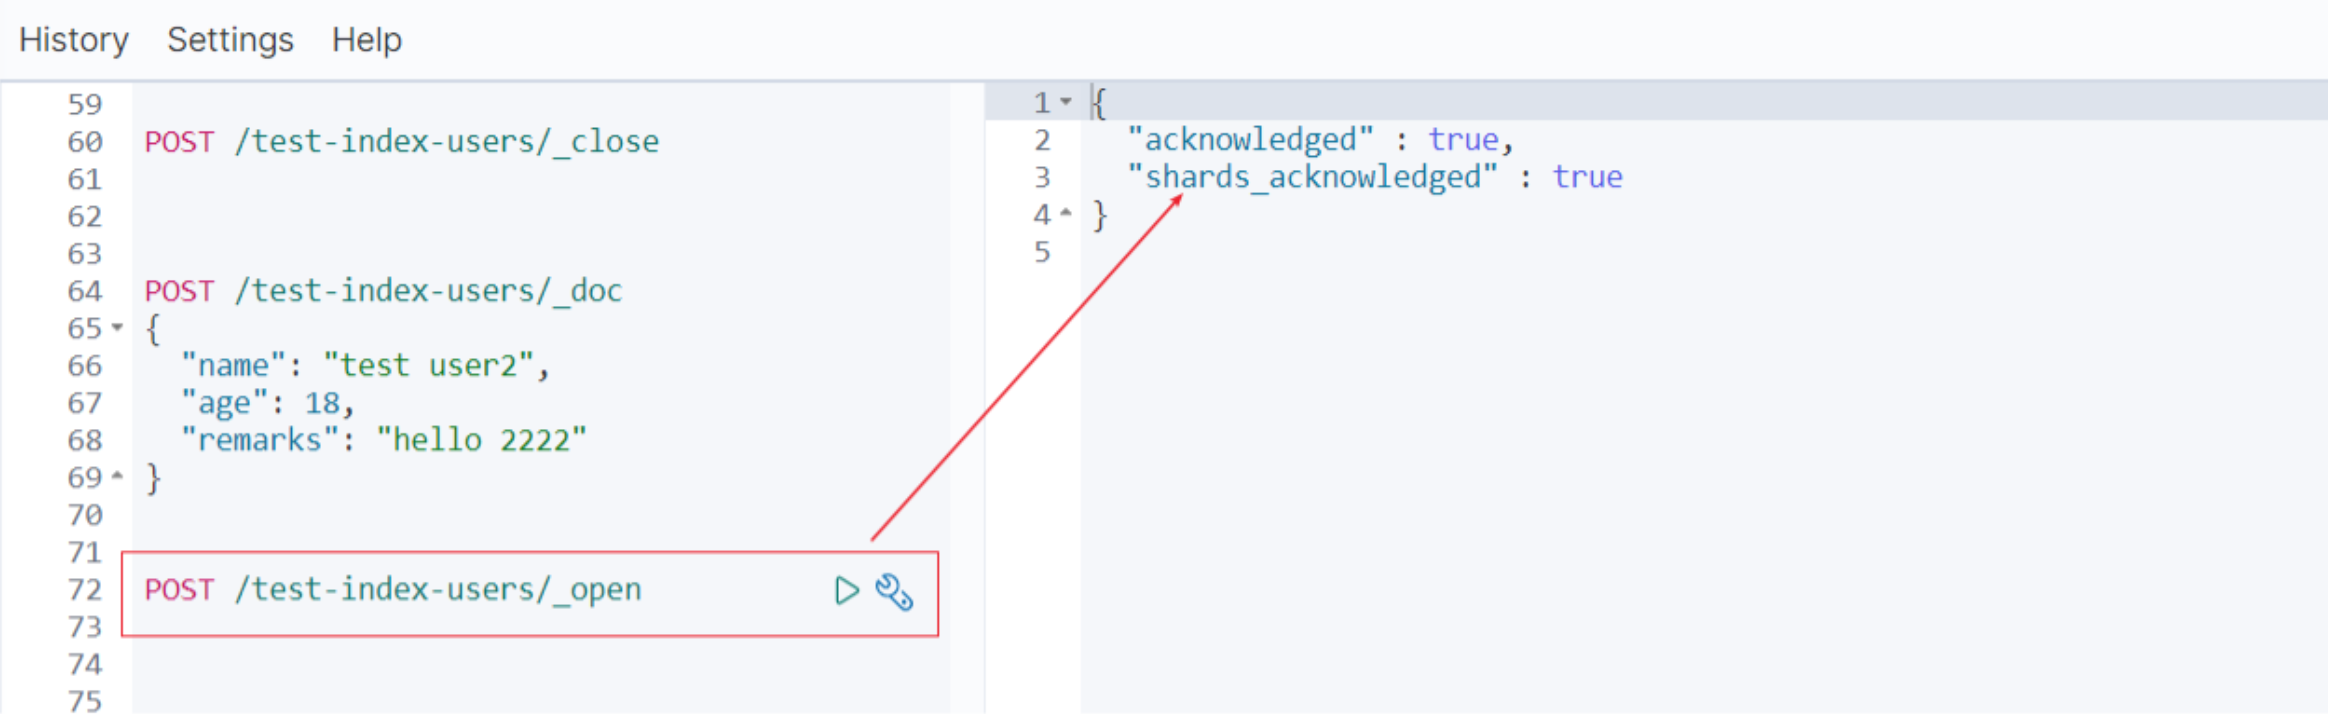
打开后又可以重新写数据了
3.4 删除索引
最后我们将创建的test-index-users删除。
DELETE /test-index-users

3.5 查看索引
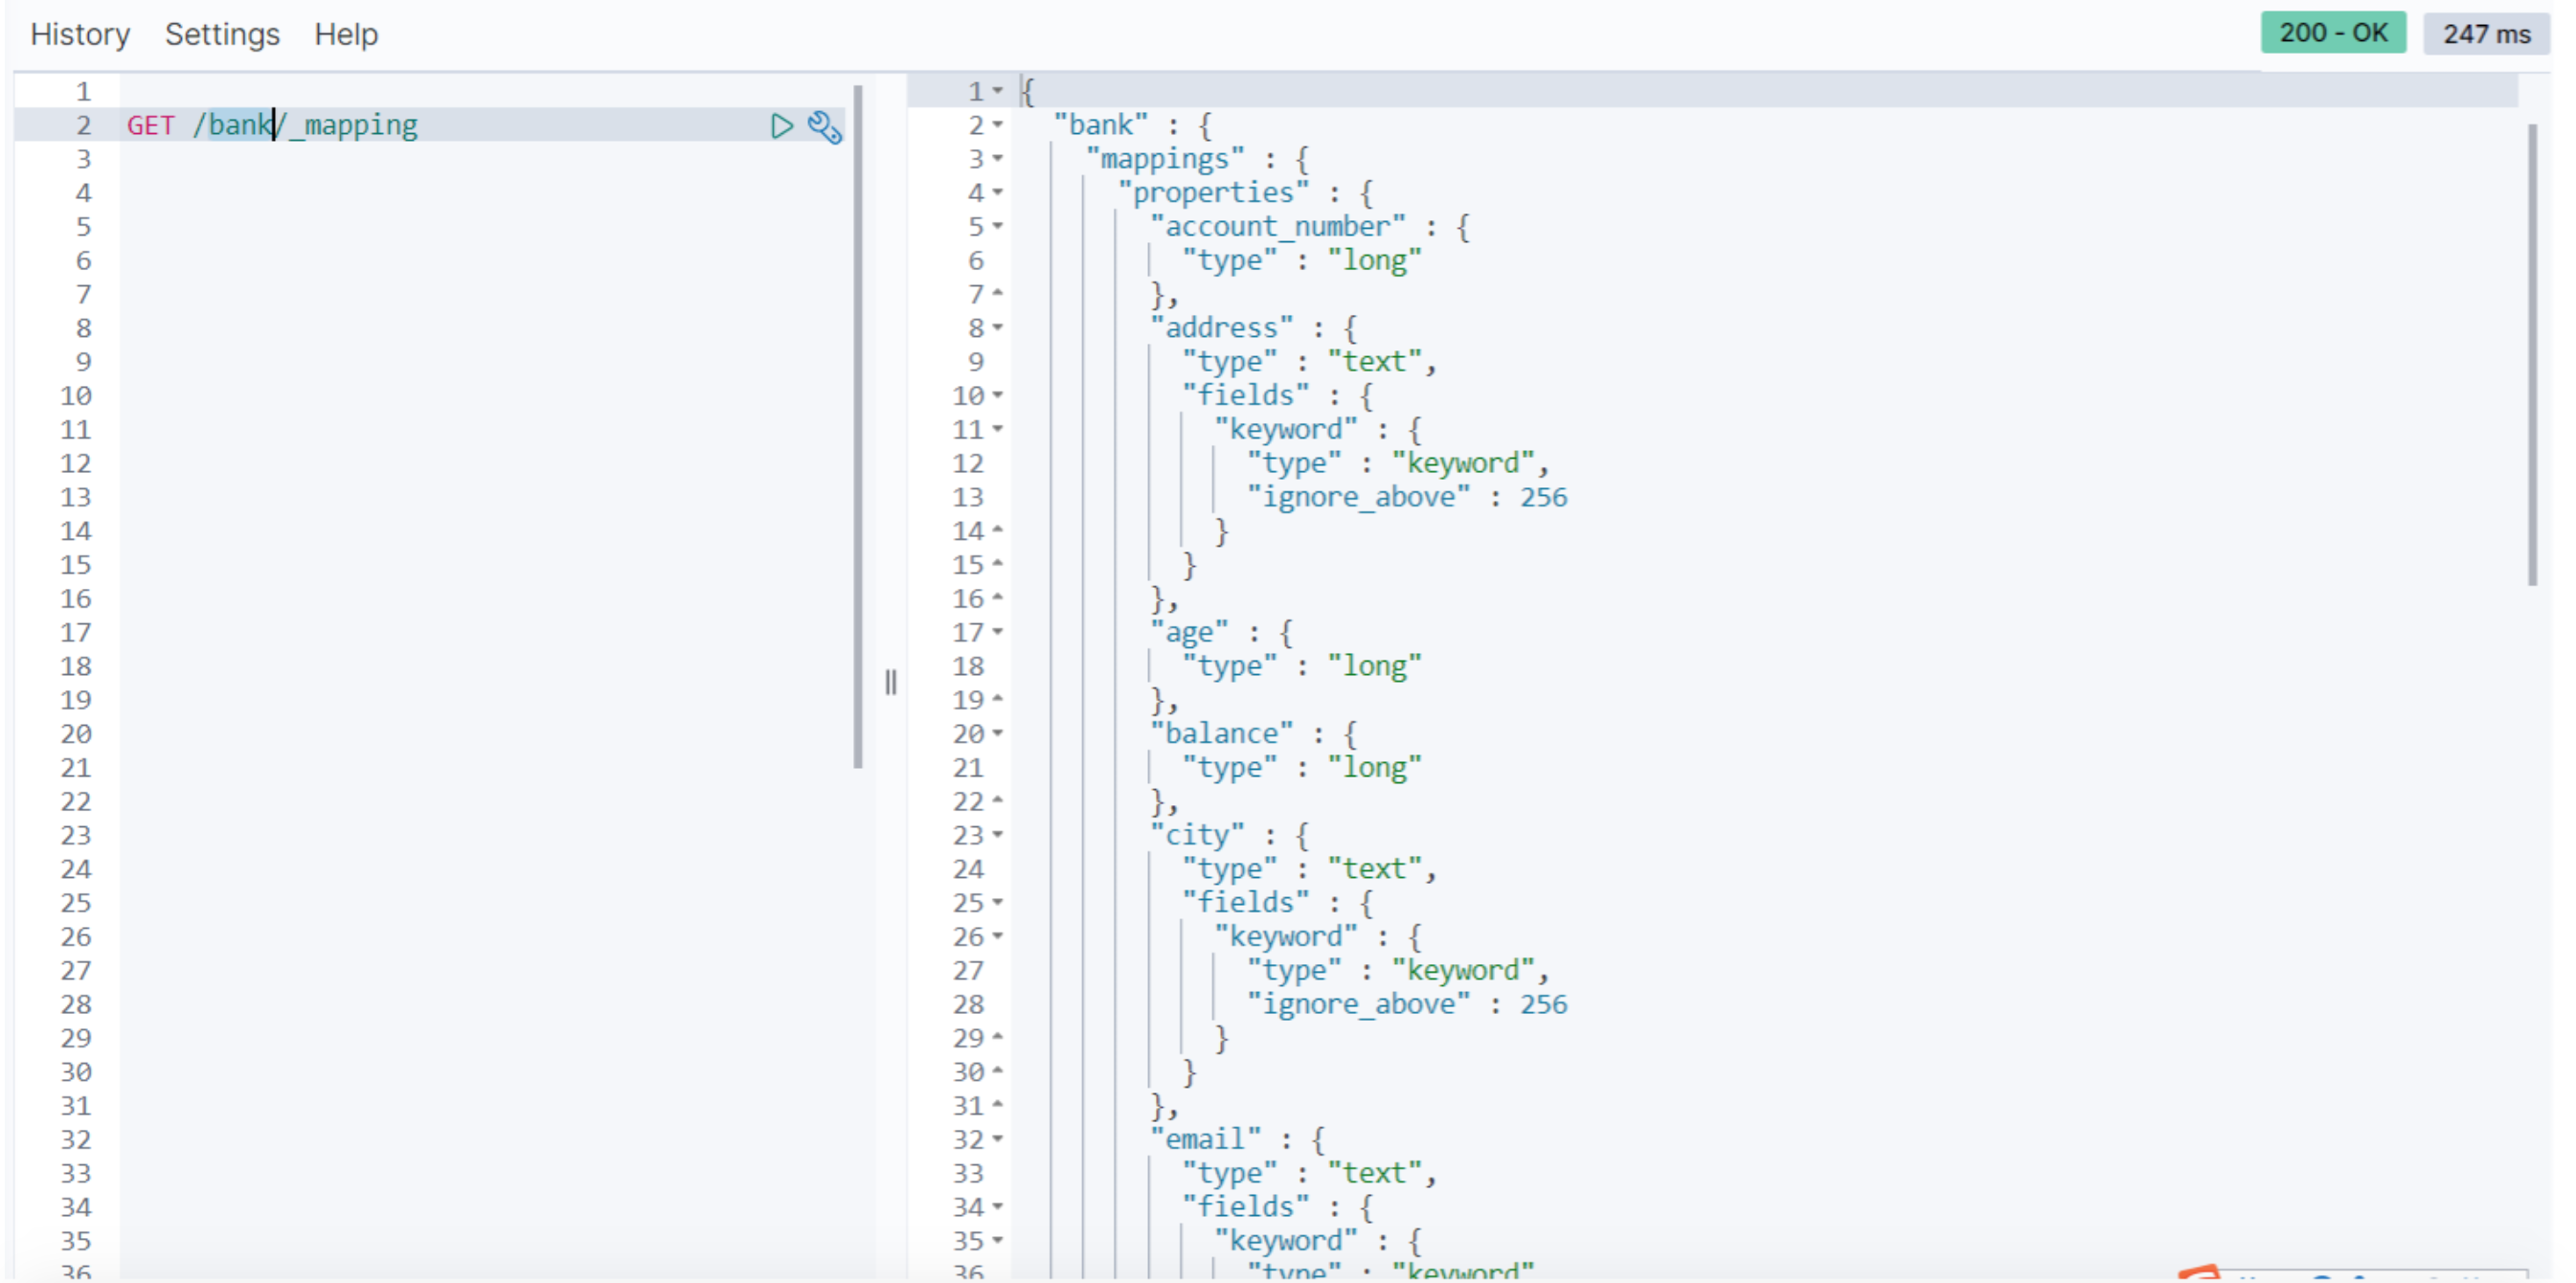
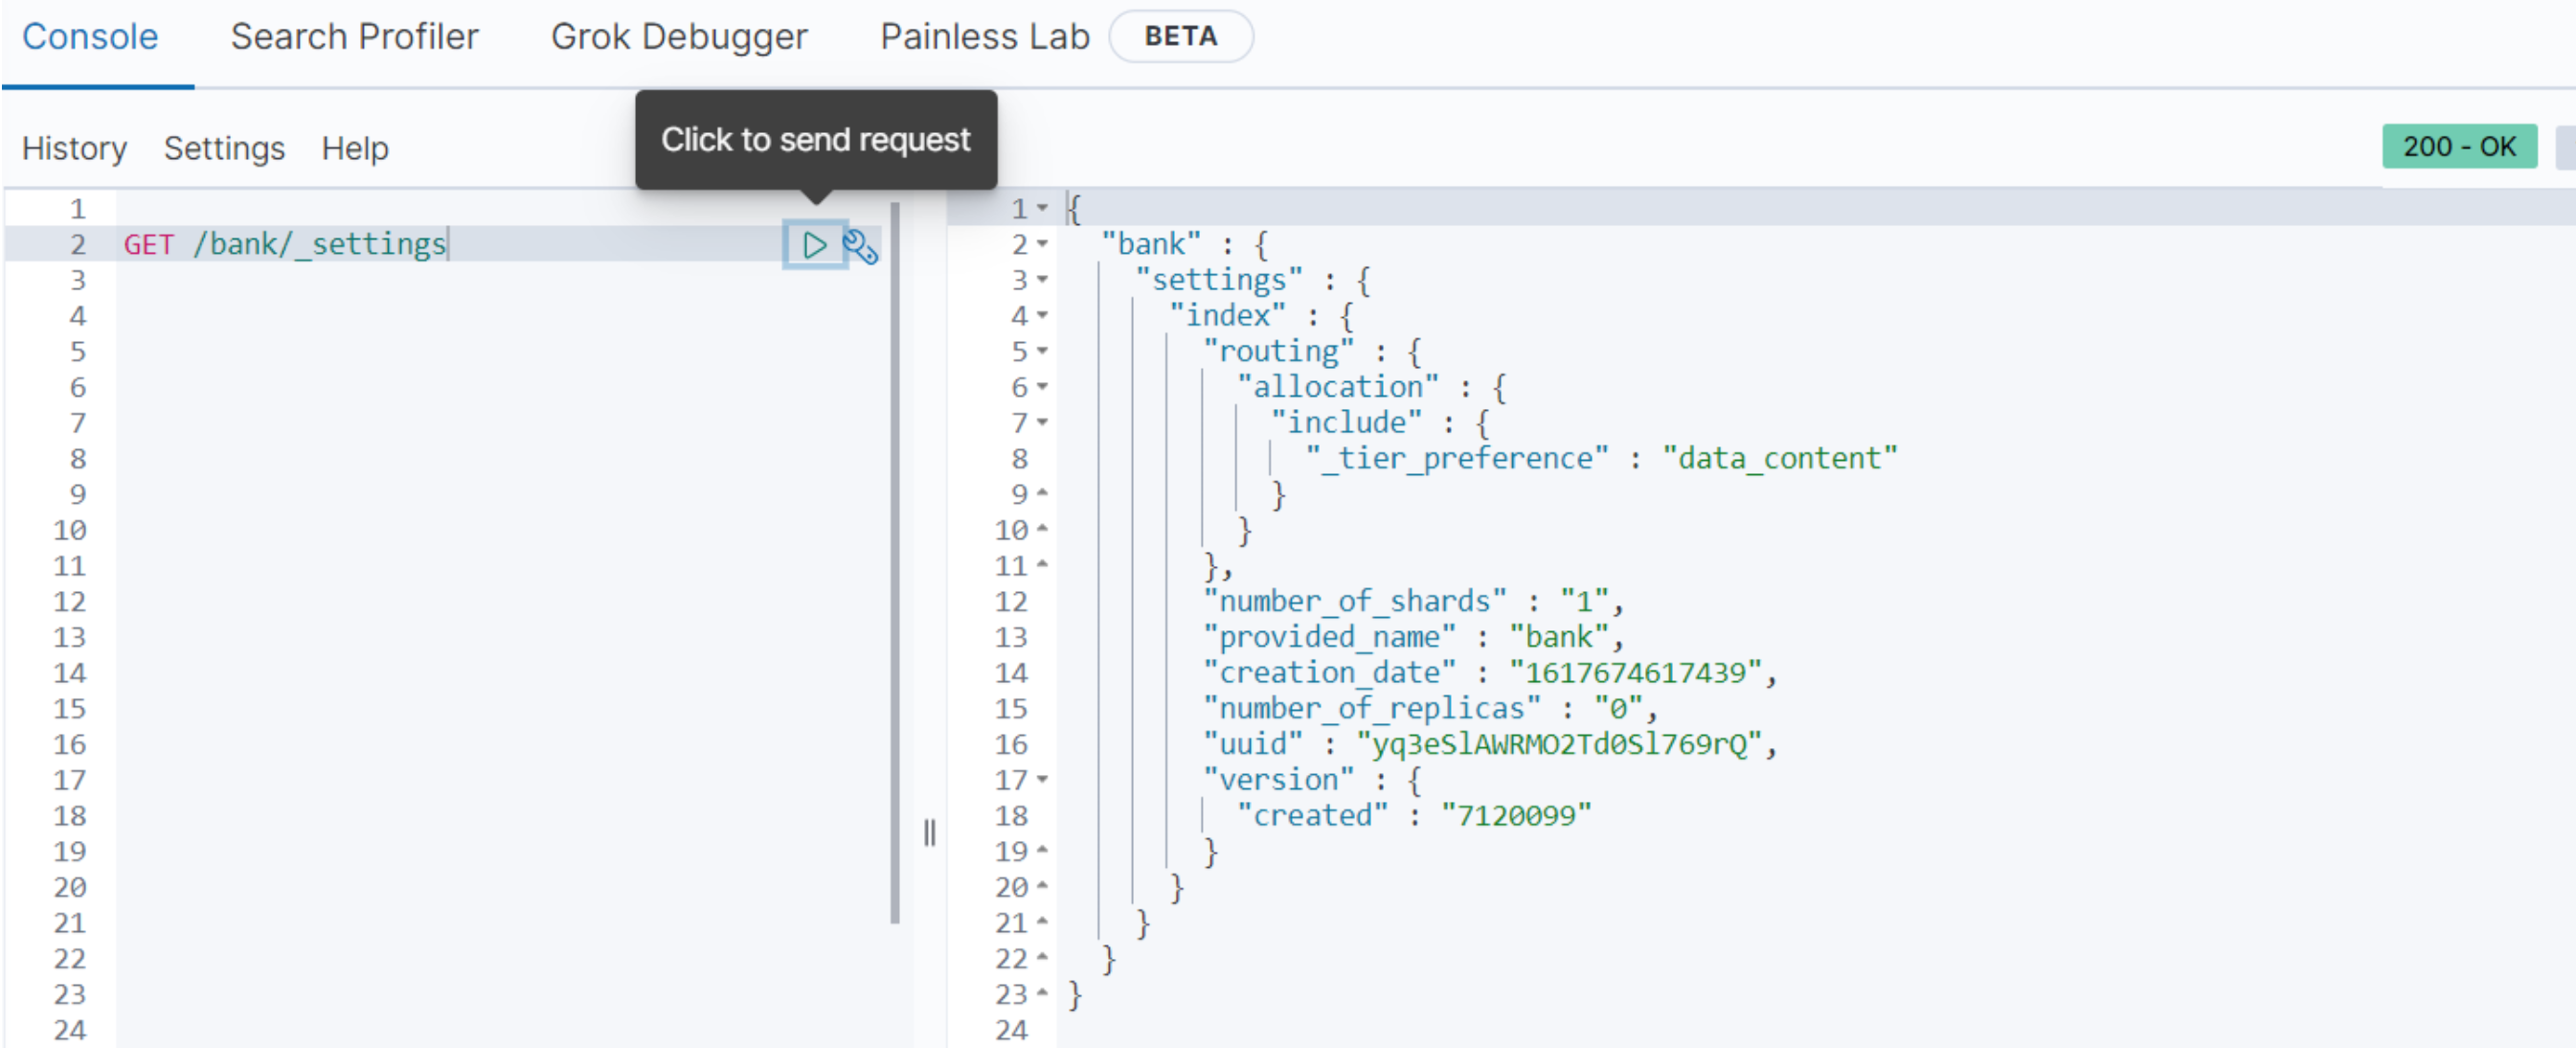
由于test-index-users被删除,所以我们看下之前bank的索引的信息
- mapping
GET /bank/_mapping
- settings
GET /bank/_settings
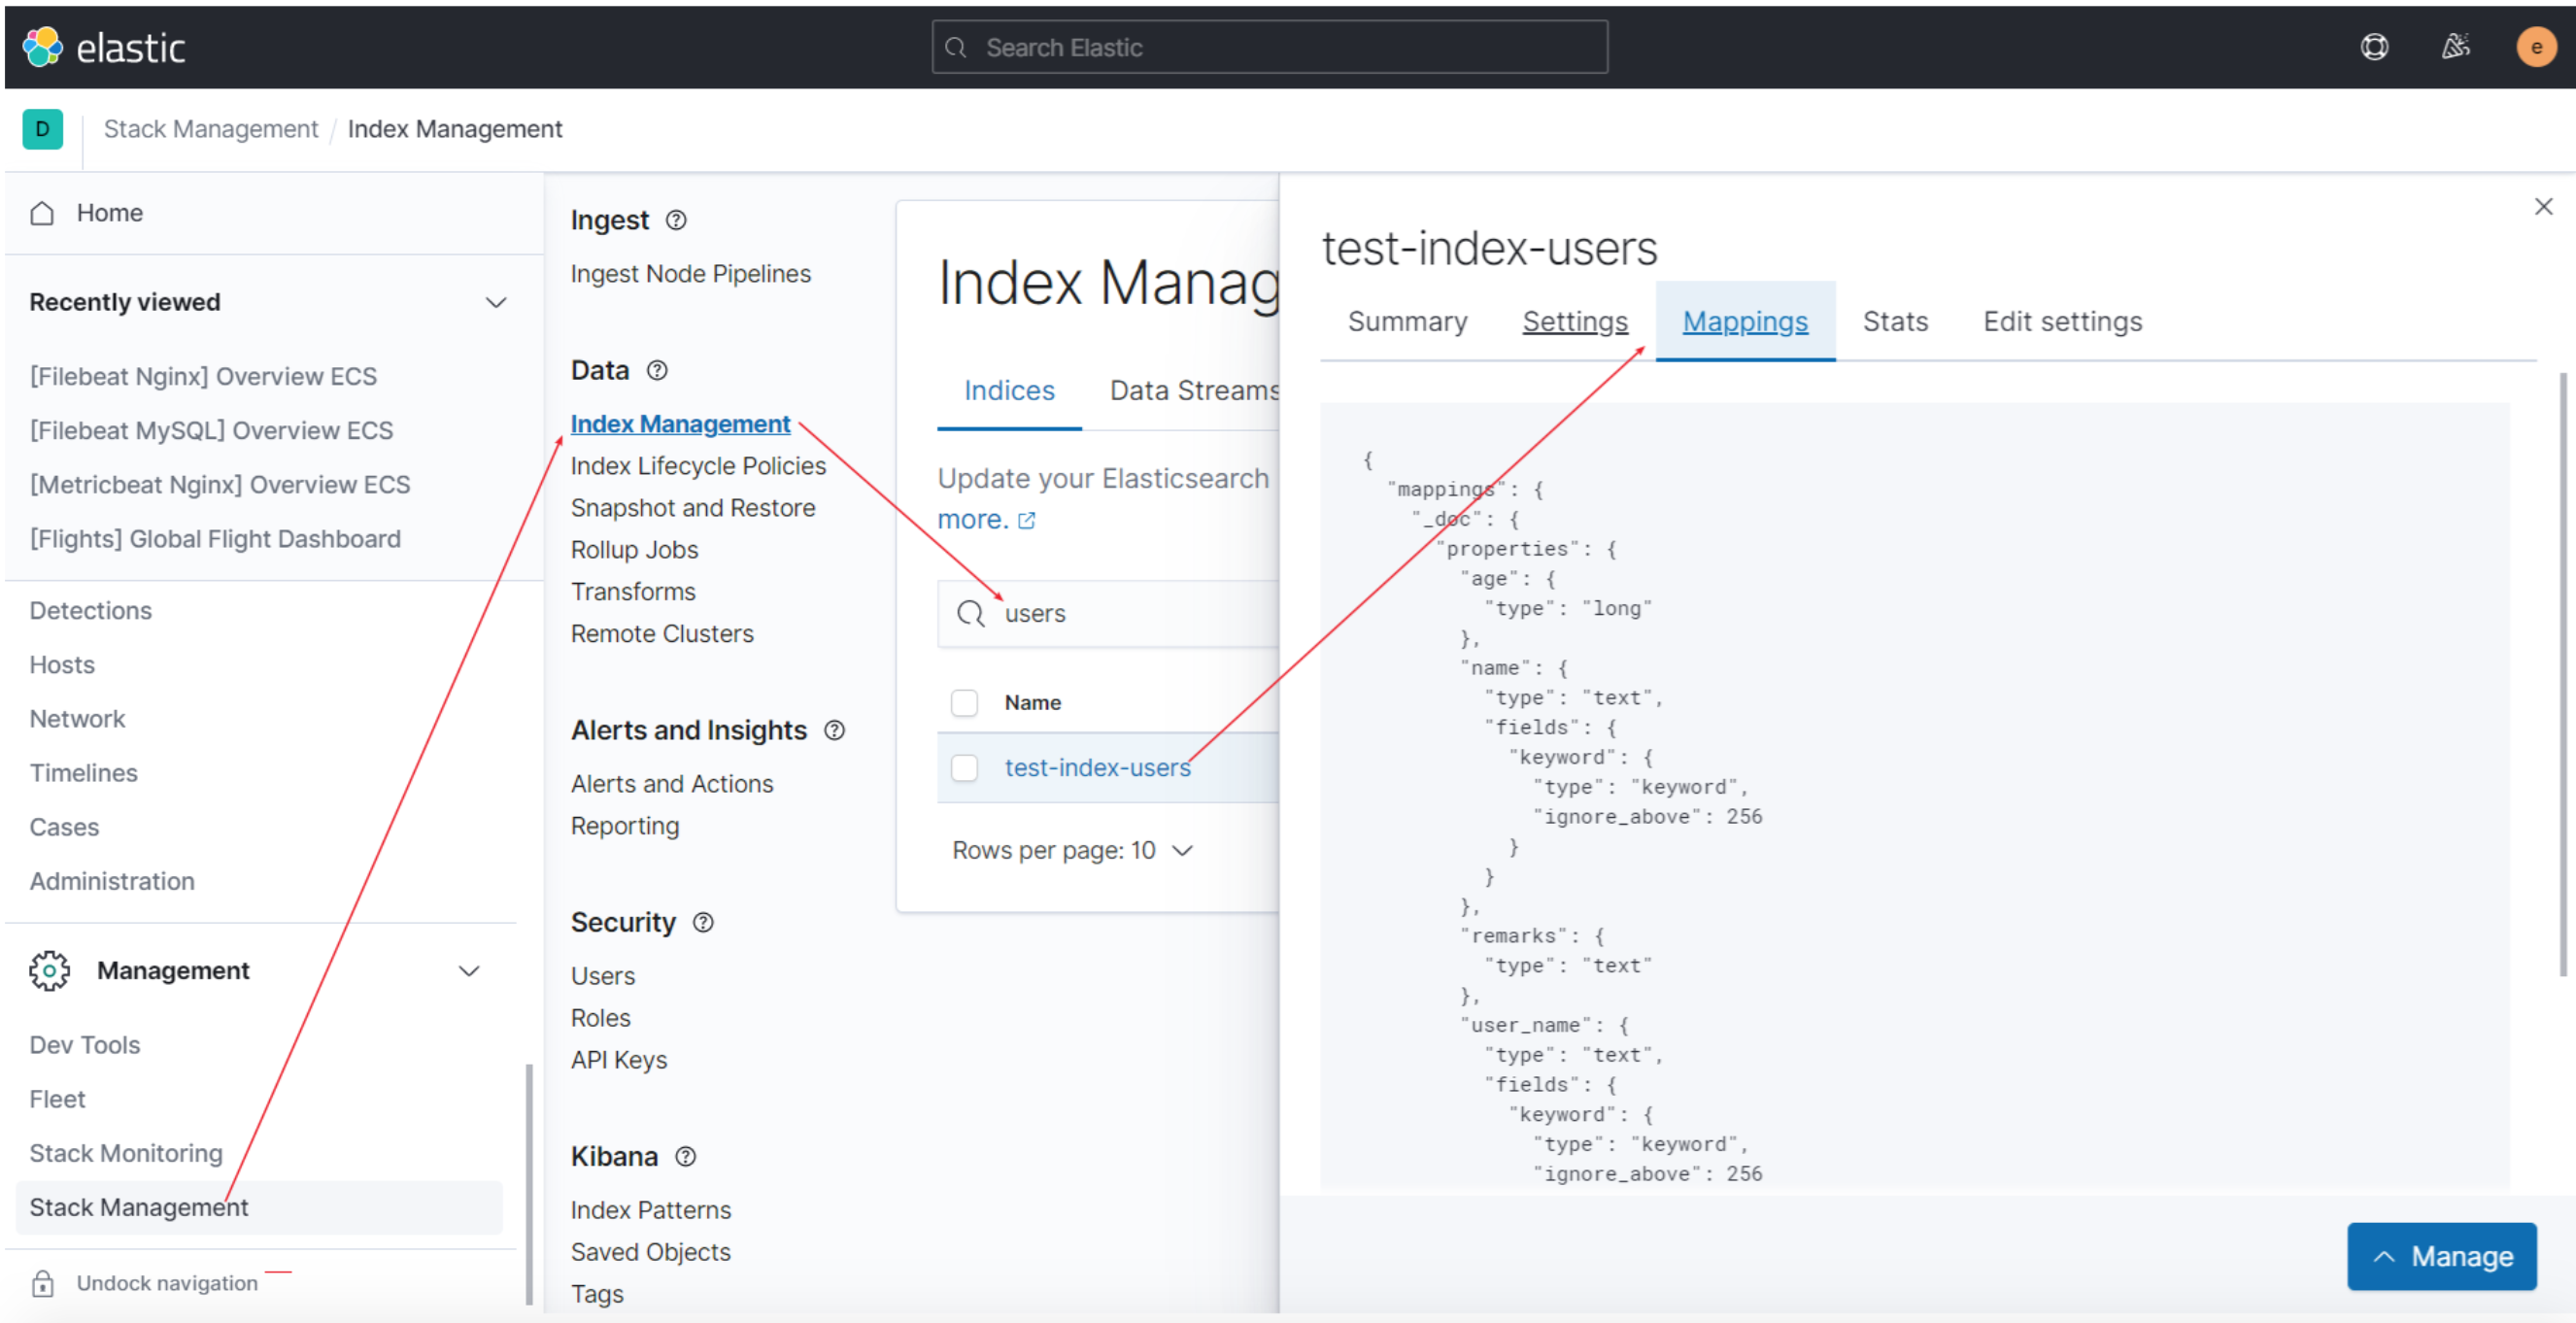
4. Kibana管理索引
在Kibana如下路径,我们可以查看和管理索引